
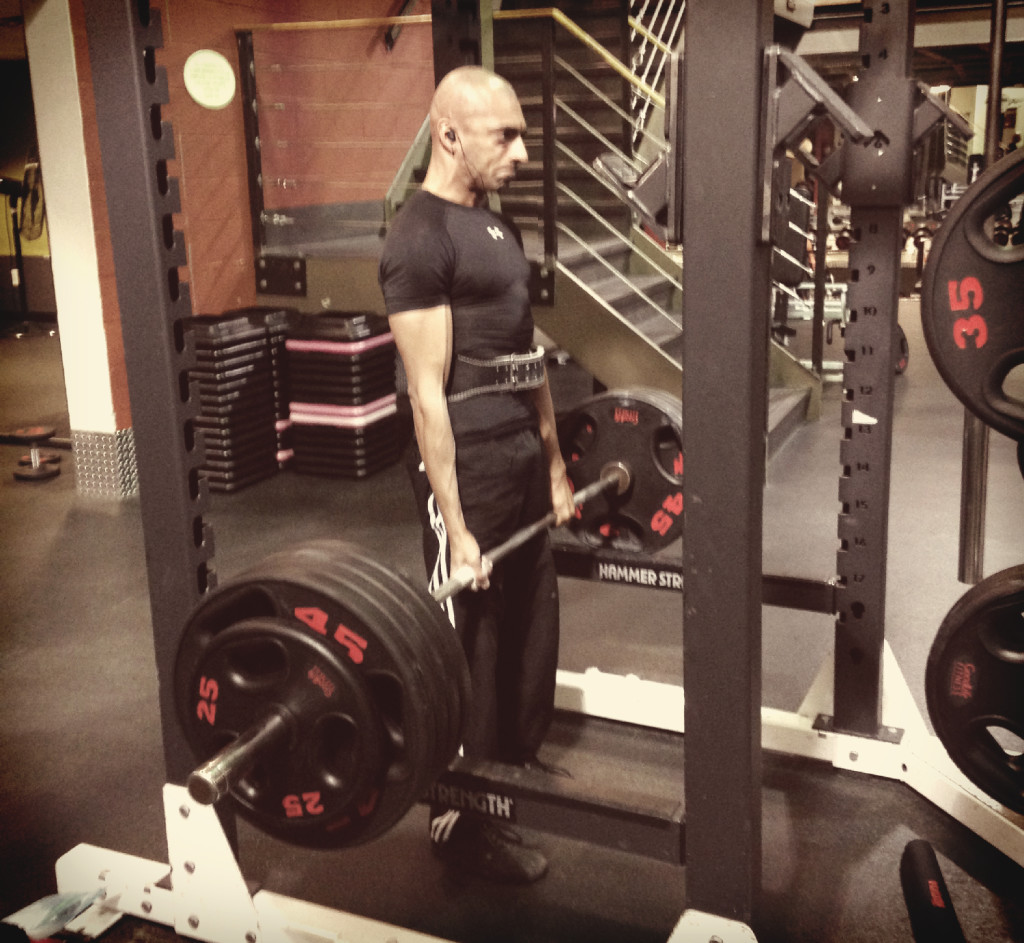
 They say the first step in solving any problem that you may have, is admitting that you actually have one. So I applaud you for being here; you know you have a shitty pull and have chosen to do something about it.
Even more bonus points if you’re a guy, because this is not an easy thing to admit. In today’s day and age, having a terrible deadlift is almost as embarrassing as having a weak bench press.
I should know, because my bench sucks due to shoulder problems from gymnastics.
Thankfully though, my deadlifts do not suffer from such suckage.
Nor do the deadlifts of my clients and athletes.
A Brief History Of My Best Pulls:
- 402.3lbs at 129 (back in 2012 for a National Record)
- 405lbs at 130 (in the gym)
- 520lbs rack pull at 130
I know it’s nothing outrageous, but ask anyone that knows a thing or two about deadlifts, and they’ll tell you that a 3x bodyweight pull (or higher) is basically classified as elite. So if you’re not ripping 3x your bodyweight off the floor, allow me to show you the ways.
Before We Get Started
I can’t possibly know how much experience you have with the deadlift – but chances are that if you have the self-awareness to know that it needs work, then you’ve at least gotten your hands dirty with the lift for a few months or so.
As such, I’ll start off with some basic tips and move on to the more “advanced” techniques. Feel free to scroll down a little if you’re truly an intermediate/advanced lifter. I can’t stop you. But my suggestion would be to go through this entire article. It never hurts to go over the basics.
Oh, and if don’t already know your one-rep max then I suggest going to the gym and finding out what it is. This article will talk about percentages, and you need to base that off the biggest pull you can currently manage.
Tip 1: Your Mentality
Doing multiple sets of heavy deadlifts is exhausting. It’s soul-sucking. There is almost nothing else that will tax your body to its limits than doing a set of triples at 90-95% of your max.
As such, every time you approach the bar (even if you’re pulling a lighter weight) you need to figure out your personal ritual to get in the zone.
If you don’t practice getting in the zone early, you won’t know how to do it when you’re going for a new Personal Record.
Mine is to have an absolute hatred for the bar. When I step up to pull, it’s war. Everything around me becomes insignificant. It’s me V.S the bar, and I don’t like losing. That shit is going up, whether it likes it or not.
That’s the mentality I come from, maybe it’ll work for you, maybe it won’t. I know lifters that are the complete opposite and appear as calm as Buddhist Monks before their max effort pull. If that’s what works, do it. Spend some time figuring it out. The right mindset will easily add 10lbs to your max.
Tip 2: Frequency
One of the easiest ways to master something is to do it over and over again until it’s hard-wired into your brain. I mean, do you really think that Kim Kardashian gets confused when you put a meat popsicle in her hands? Hell no; the girl could give a masterful handjob in her sleep.
In the same manner, I could literally roll out of bed and pull 3 plates right off the floor. In fact, when I train after working a 12 hour day, that’s basically what it feels like.
So what exactly are we hard-wiring? The pain? The brutality? Sort of, but mainly technique (we’ll talk about the specifics of that in a moment).
Your technique needs to be so good at lighter loads that when you do go for that true one rep maximum (1RM), it’ll be an afterthought. In fact, the higher the load, the shitter your technique gets, so if you don’t have a picture-perfect lift at 80% of your 1RM, you’re destined for mediocrity.
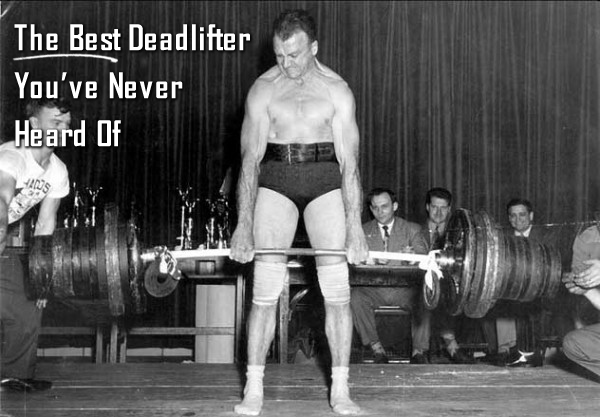
Bob Peoples is the perfect example of why high-frequency works — he pulled 725lbs at 181lbs.
At the age of 40.
Back in 1949!
Just to remind you, this was an era where steroids were basically nonexistent, training equipment was frugal and people had demanding physical labor jobs.
Bob spent his days busting ass on the farm, then at night time pulled heavy things off the floor. Six times per week. This is why his record stood for decades. Contrast that with the gym bro’s of today that won’t lift more than a few times per week due to the fear of “overtraining.”
No wonder most of their deadlifts suck!
“if you don’t have a picture-perfect lift at 80% of your 1RM, you’re destined for mediocrity.” (Tweet This)
Having said all of that, it might come as a shocker that I don’t really do heavy deadlifts that often anymore. In fact, I only do them once a week… but when I do train, I go all out. Some guys I know who are amazing pullers train it even less than that. So how do we manage to increase the weight on the bar? Easy, by kicking ass on the deadlift variations and assistant exercises (we’ll get to these).
Also, we’ve earned the right. If you haven’t been deadlifting seriously for at least a year straight, then you haven’t earned that right. You need to be pulling 3x a week – not necessarily to set Personal Records, but to get the reps in.
How To Get Started With High-Frequency Pulling
You might be wondering how to effectively program a high-frequency deadlift training session. Well, wonder no more because I’ve put together a complete plan that spans three weeks long and will most likely add about 30lbs to your 1RM. It basically puts everything you’re about to learn on this page into one tight, neat little package… for FREE. Click Here to grab the plan.
(If for some reason that link doesn’t work, just hit up BadassStrength.com
Tip 3: Optimizing Your Stance
 There are many schools of thought on this and while I’m going to lay down what works best for me, I highly suggest you play around till you find a stance that works the best for your body’s natural biomechanical structure. If there is anyone that says one stance is absolutely better than another, run away. There are no absolutes; except for the fact that deadlifts are awesome.
I personally have long legs and therefore a hip-width stance works the best. I’ve tried the really close width stance, and the theory behind it is that if you were to do your most powerful, explosive vertical jump, you would have your feet close together. But this theory doesn’t always lend well to application – although there are dudes who pull monster weights with a close stance.
Then there are some who go slightly wider than hip-width but not quite sumo. I switch back and forth between these just to keep myself entertained, but my bread-and-butter is conventional.
Benefits Of A Wider (But Not Quite Sumo) Stance
First, it marginally decreases the distance you need to pull the bar, which can be a huge plus for short dudes/dudettes. Next, it increases the surface area of your base, and the bigger the base, the more stable you are which could result in a bigger pull. The downside is that you might buckle your knees inward which, besides making you look like an amateur, will rob you of power.
The next thing we need to address is the angle of your feet. Again, there aren’t any “absolute” angles but the general rule of thumb is that your toes should be pointed outward anywhere from 10-15 degrees.
Pro Tip: Do a rack pull at 100% of your max and play around with the stances. Whatever feels the best and most powerful while standing with a shit load of weight is probably what you should go with.
What About Sumo?
If you’re stronger in the sumo stance, and the outright number you need to pull is of importance (such as for powerlifting) then use it. Usually, women tend to do better with the sumo stance due to their hip structure.
However, if you’re not a powerlifter and just want a bigger deadlift so you can have that strength carryover to football, wrestling, MMA or some other sport then I highly recommend you stick with the conventional stance. This isn’t to say sumo has no carryover, but for sport performance I’ve found the conventional pull to be superior, and also, there’s no need to put so much strain on your hips.
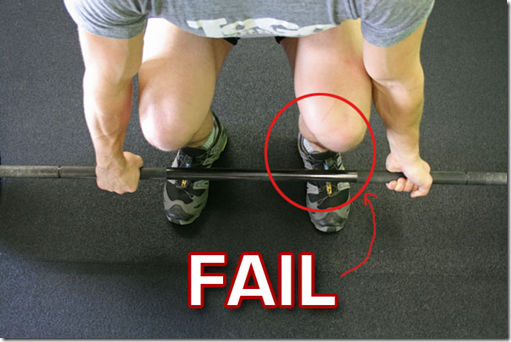
Tip 4: Show Your Shins Some Love Hate
I’ve noticed that some of the best deadlifters in the world (sumo or otherwise) have two things in common:
- Their shins (tibia) are perfectly vertical – like, totally perpendicular to the floor
- They wear shin bruises and cuts as a badge of honor
 You might think that second point is just to showcase a “bad-ass” status. Sort of like how CrossFitters put on Kinotape to show the world that they lift.
No so; it has to do with leverages.
During the deadlift, if the bar gets away from you even by an inch or two, this results in a more challenging pull since you’ve now increased the moment arm for both your knee and hip extensors.
If you don’t know what that means, just remember that the closer the bar is to you, the easier it is to pull. It just so happens that when you do this in shorts without long socks or long pants, you end up with the bar grinding against your shins. No big deal, just suck it up — a bigger deadlift is more important anyways.
Let’s go back to point number one for a second: why is the shin angle so important?
When your tibia is completely vertical (perpendicular to the ground) then all the force you output will be in a singular fashion, going down into the ground. In return, the ground will apply that same amount of force right back to you (if you paid attention in physics class, this is Newton’s 3rd law).
However, when you have shins that lean forward a little bit due to ankle flexion, now you’re spreading out that same amount of force between a vertical and a horizontal vector. It’s like giving away a slice of the pie when you could’ve had the whole thing (the pie represents the total amount of power you would generate).
So what does this mean for your pull? Well in layman’s terms, it results in wasted effort and a weaker deadlift.
“What If I Have Trouble Keeping My Shins Vertical?”
Well first of all, you’ll just have to spend more time on the technique but here’s another mind-blowing insight: as you start the pull, your body will do what it needs to do in order to make the shins vertical – usually by raising your hips. Watch almost any video of someone who starts their deadlift with shins that are leaning forward and you’ll notice they cannot finish their lift until their body compensates and gets to a position where the shins are vertical.
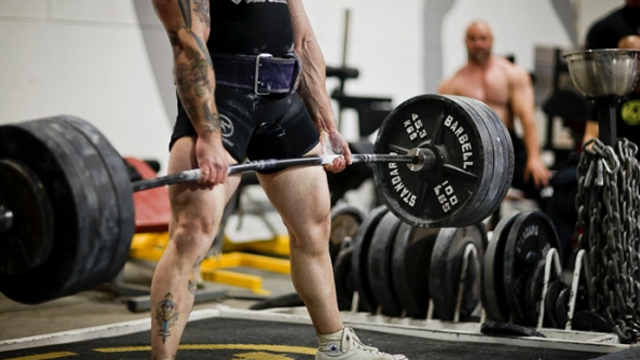
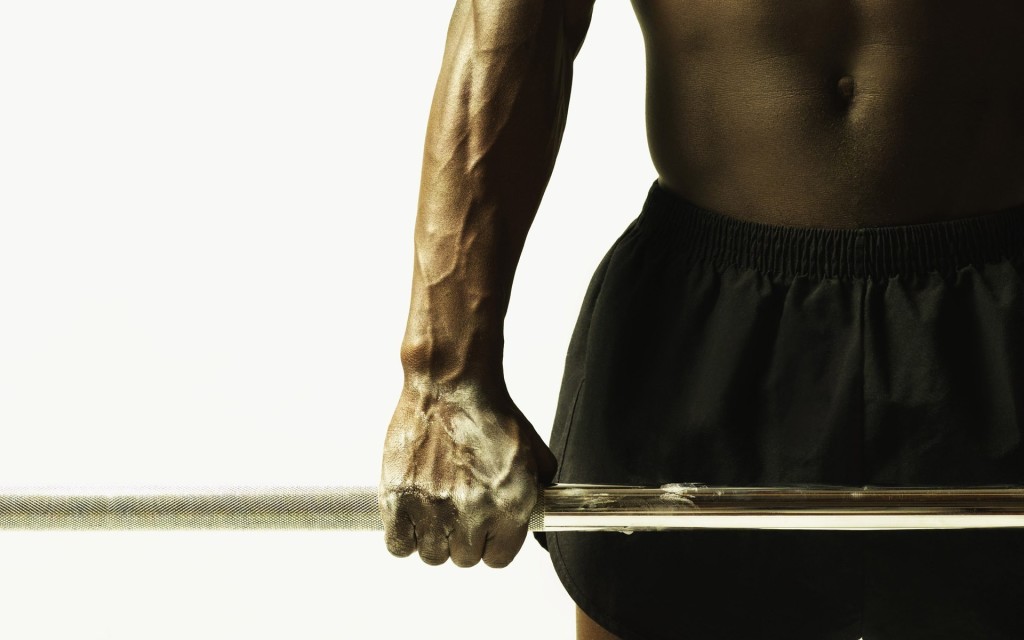
Tip 5: Your Grip & Arm Position
First let’s get some of the core basics out of the way:
- Ditch the stupid gloves already. Seriously, leather belongs inside a car, or on a purse, but not on your hands during a deadlift.
- Get some chalk. If you gym doesn’t “allow” it then sneak it in and be smart about how you use it. A no-mess option could be LiquidGrip. I’ve heard it provides a decent grip. The only downside is that it looks as if someone ejaculated on your hands.
- Yes, you will get causes. Get over it. In fact, start actively developing them. Great deadlifters have great clauses.
- You’re only allowed to use straps if you’re deadlifting close to 3x bodyweight and/or doing heavy, high volume shrug work.
- Use a proper deadlift bar when possible. This means bars that are thinner in diameter and don’t have aggressive knurlings, otherwise those clauses you’ve worked so hard to build will get ripped right off. If you have your own gym setup and a brand new bar, sand down the grip area you need for the deadlift. Trust me, you’ll thank me later.
Overhand or Mixed Grip?
 If you follow all the tips on this page, it’s highly unlikely that you’ll ever seriously injure yourself on the deadlift. Having said that, when you start to get strong – and I mean really strong – then you need to be careful while using a mixed grip. The arm which is supinated (palms up) is at a risk for a bicep tear if you’re not careful. The best way to avoid a bicep tear is to:
- Strengthen the bicep muscle (duh)
- Don’t jerk the bar off the floor
- Don’t try and “curl” the bar during the deadlift
I tell my clients and athletes to think of their arms as chains and their hands as hooks. If you’ve ever seen something being pulled up using chains, you know what I’m talking about – the chain is stiff and tight but doesn’t flex on its own. It’s just dead weight. In the same way, your arms are just there to hang on to the bar, while your entire posterior chain is doing the work to get it off the floor. Keep this in mind and you’ll be fine.
With that said, I’d encourage you to deadlift double overhand (both palms facing down) while doing lighter sets. Not only does help you increase your grip strength, but the pronation of your hand greatly minimizes the chances of a torn bicep.
“leather belongs inside a car, or on a purse, but not on your hands during a deadlift.” (Tweet This)
What About A Hook Grip?
No!
Unless you’ve been training with a hook grip for a long time and know what you’re doing, there’s no need to put your thumbs at risk. Stick to the advice listed above and you’ll be fine.
Tips 6: Optimize Spine Position
 This is a very hot topic between trainers and lifters alike – should the back be straight or rounded during the deadlift? And if so, is it really dangerous?
As is with the theme of this article, my goal is for you to walk away with practical advice you can take to the gym instead of getting too technical, so I’ll keep it simple:
- Newbie lifters should be practicing a flat back deadlift for at least a year before playing around with other technique modifications. The reason is simple – it is nearly impossible to suffer from a back injury while doing a deadlift with a neutral spine.
- The reason people round their backs when doing heavy pulls isn’t always because they’re weak, but because the body is trying to optimize its leverages to get the bar up. A rounded back shortens the distance of the moment arm from the hips. And as you remember from tip 4, the closer the bar is to you, the easier the pull. Generally speaking, the bottleneck of deadlift strength are the hip flexors, not the hamstrings or the back.
- A rounded back deadlift is OK when the following criteria are met: the lifter is experienced and has strong erector muscles, the rounding happens in the thoracic region not the lumbar region (which should stay flat), the lifter has a strong and well-developed core, the lifter has practiced this specific technique under coaching and guidance.
There is no better example of a great round-back deadlifter than the legend that is KK (Konstantin Konstantinovs). See the video below…
Again, I cannot emphasize enough that just because KK is a monster with the round-back method, don’t assume you can pull of the samet hing. He’s been doing it this way for 16 years and meets all the above-mentioned criteria. Here’s what he has the say in his own words:
“…that I will break my back is something I heard from as long as I started to deadlift, or for the last 16 years. I have always deadlifted with a rounded back. My legs have always been lagging in development, but results in deadlift have always been increasing. My back is prone to injuries only when I squat with a heavy weight, but when I deadlift, my back remains in the same rounded position throughout the lift, irrespective of whether I can lift the weight or not, and this protects it from injury. But you need very strong abs if you want to deadlift like that.”
The Debate About Head Position
There are two schools of thought on how the cervical spine (neck) should behave during the deadlift. Some say the chin tucked in so that it helps you keep that neutral spine position, while others say looking up helps with the pull.
My suggestion? Do both.
I try and keep my chin tucked in most of the time, however during heavy ass pulls when I’m really pushing the limits or going for a new PR, I’ll end up looking to the ceiling as I lock out. I’ve talked to many elite lifters and they have reported back saying the same thing – looking up helps.
Tip 7: Pick The Right Footwear (Or Don’t)
If you deadlift in running shoes, or any shoes for that matter, you’re probably robbing yourself of your true one rep max. The reason for this is due to the heel lift most shoes have built into them. When your heel is lifted off the floor, your posterior chain doesn’t fire as effectively as when your feet are completely flat.
Also, most running shoes are made to lessen the impact of running (duh), so they’re basically giant shock absorbers. But for lifting heavy things, what you need above all else is a stable surface. Doing any type of heavy strength work in running shoes is like standing in sand – it’s a very unstable surface for your ankles. And instability does not equal maximum force, but does equal possible injury.
The ideal scenario would be to deadlift barefoot or in Vibrams because under heavy load it allows your toes to spread out, increasing your base area and thus, stability. The second best option is to buy a pair of ballet slippers which have a very thin sole so you’re as close to the floor as you can possibly get while still covering your feet. The option after that would be to get shoes that have zero heel lift and flat soles, such as Chuck Taylor’s.
To be honest, just go barefoot whenever possible. Some of my best training sessions ever have been due to going barefoot.
Tip 8: Make That Ass Work During The Lockout
A scary amount of people lean wayyy too far back during the lockout, putting the spine in hyperextension. This is literally one of the worst things you can do besides pulling with a rounded lumbar spine.
To illustrate what I mean, allow me to show you the worst deadlift I’ve ever seen – seriously, this shit makes CrossFitters look good. The video lies below; please try and control your gag reflex.
https://youtu.be/Yg49CiOHQec
My favorite part is the “Snap On” shirt he’s wearing. The irony just kills me.
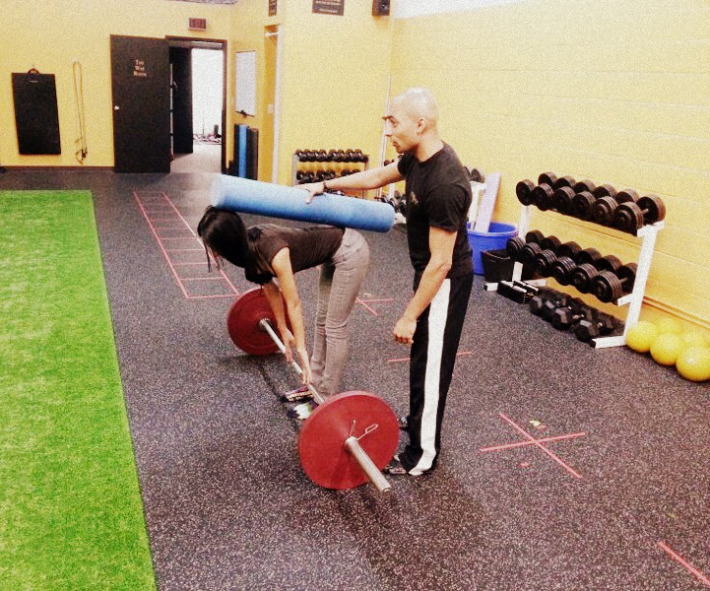
So how exactly are you supposed to lock out? Be squeezing your ass cheeks together so hard that if there was a peanut between them, it would turn into peanut butter. If you want to know what a good glute contraction should feel like, do a regular bodyweight glute bridge and hold it at the top for 10 seconds. Make sure your body is completely straight – no sagging of the butt.
It is literally impossible to do a glute bridge without actually having your glutes fire, so this is a great drill. Once you get the hang of it, you just have to do it while standing up. To see a proper example, check out the video below of some of my clients doing the deadlift – pay special attention at the 32 second mark when you get to see Miriam do the deadlift from the back.
Now I didn’t choose that angle to show you that she has a great ass (which she does, so enjoy) but to demonstrate the glute squeeze in practice. In fact, she has a great ass because she engages it properly during her deadlifts.
Pro Tip: Ladies, if you want that perky booty then you may hire me to design your next strength training plan where I incorporate heavy deadlifts and other specialty exercises to really build and perk up your butt. A flat rear-end doesn’t have to be a life sentence! Click here for a FREE consultation.
Tip 9: Try Different Deadlift Variations
If you’re a conventional puller, throw some sumo deadlifts in the mix, and if you’re a sumo puller, you’ll benefit from the conventional stance. On top of that, there are some great variations you can use to really hammer your weak points such as deficits and rack pulls. See the complete list below.
Rack Pulls (Rack Deadlifts)
These are great if you’re having trouble with the lockout. Ideally you should get to a point where you can rack pull 130% of your max off the floor.
Deficit Deadlifts
If you have the opposite problem where lockouts are easy but you just can’t get the damn bar off the floor quickly enough, these should be a staple in your training program!
Trap Bar Deadlifts
Remember when I said you cannot deadlift unless your shins are vertical? Well, now you can – with the trap bar. This variation allows your shins to lean forward, but because you’re right in the center and can get your hips lower, you can really engage the quads to help you with your pull. This means for 95% of you, your trap bar max will be higher than your barbell max. It’s one of the only times where you can accurately say that someone is “squatting” their deadlift.
Tip 10: Eliminate Weak Links In Your Chain
Regardless of how strong you get, there will always be a few weak links in your chain that you’ll have to address. This is why accessory work is so important. While deadlifting to become better at the deadlift is always sound advice, it will stop working at some point.
So below are list of some of my favorite exercises that are proven to help you get a bigger pull.
- Barbell goodmorning
- Close stance box squat
- Pendlay rows
- Seated cable rows
- Heavy pullup/chinup work
- One arm dumbbell rows (also great for grip strength)
- Barbell shrugs
- Olympic squat (basically, a squat in a closer stance with full range of motion – ass to grass)
- Dumbbell one-legged deadlifts
- Bicep curls
A Few Last Words Before You Go And Crush It
One of the best things I ever did for my deadlift is to get assistance and help from those that have already walked the path I wanted to walk. I hired a specialist to plan things out for me in the beginning, and asked those that already had records under their belt.
This decision alone probably shaved off 5 years worth of trial and error on my part. On top of that, I basically downloaded twenty years of strength training wisdom right into my brain. Remember that scene from The Matrix where they plug Neo into the computer and he instantly knows Kung Fu?
It was almost like that.
Too many people out there are pretending they’re experts when they really aren’t. I didn’t start giving deadlift advice until I knew I was competent myself. I have a National record under my belt, and have coached high-level athletes in powerlifting (including a few record breakers). Basically, I know a thing or two about how to get people strong and rip heavy ass weights off the floor without breaking themselves.
So let me help you put it all together – where are you struggling most with your deadlift or strength program? I want to know!
Take a moment to go and fill out an online coaching application. The consultation is completely FREE and we’ll go over what is really holding you back. Then if you feel like you could use someone to keep tabs on your lift and monitor your progress to make sure you’re headed in the right direction, I’ll take you on as a client. If not, no hard feelings.
Train hard, eat well, and refuse to be average!
One Comment
Probably the most comprehensive article on deadlifts I’ve ever read. Can’t wait to implement what I learned in my next gym session!